Taking a good headshot
Your headshot is an important part of your brand.
A great headshot makes it easier for the Marketing and Design teams at O’Reilly to make you look good on our website and elsewhere—and it also makes your products more compelling for our customers.
Your headshots should be high resolution, about 5”x7” at 300 dpi (1500x2100 pixels). The higher the resolution the better. Most smartphones today have excellent cameras with good resolution, so you don’t have to find someone who has a super-fancy camera to shoot your photos if you don’t want to pay a pro to take your headshots. Be sure to set your phone or camera at the highest resolution setting before taking the picture.
Selfie sticks are also an option, but it’s probably better to have someone else shoot the images for you so they can make sure that there aren’t any weird shadows falling on you or complicated backgrounds behind you or a lamppost coming out of your head.
Here are some tips to help you get a great photo of yourself:
1. Find someone you feel comfortable around to take photos of you.
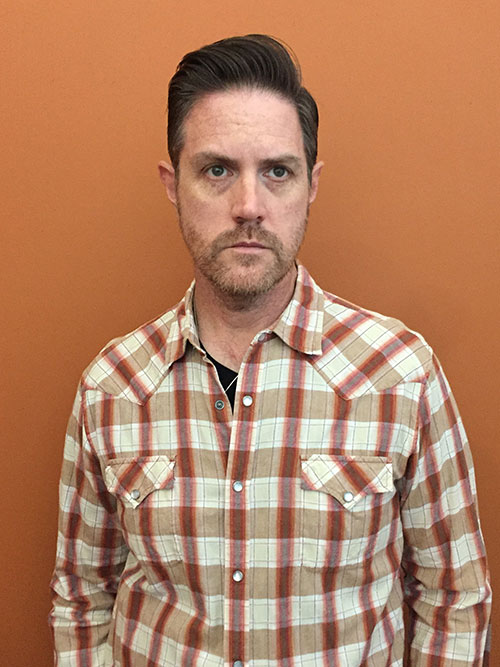
2. Look your best.
It seems like this one should go unsaid. But you would be surprised how many people don’t stop by a mirror before they take that head shot. Check your hair and teeth. Think about what you are wearing. Your shirt will be the only clothing in the picture. Aim for solid colors or clean, simple patterns. Avoid white tops, turtlenecks, and clothing that matches your skin tone.


Wrong: Check your appearance before you start shooting.


Correct: Appearance is neat and tidy.
3. Find flattering light.
Find a location with abundant natural light, but not in direct sunlight. Bright shadow is a good place to shoot portraits and will prevent squinting and accidently including the photographer’s shadow in the frame. Avoid fluorescent lighting, overhead lighting, strong sidelight, and light from below.
- Never have your strongest light source behind you. You want lights that lead to a nice, even glow, with very few shadows and soft angles.
- Cloudy, overcast days provide gorgeous, even lighting in most circumstances. Avoid the hours around noon.


Wrong: Bright sun causes squinting, and shadows can be a problem.


Correct: Photo taken indoors near large windows for natural light.
4. Check your background.
Solid colors work best for a backdrop; it’s okay if it has some texture. Watch out for strange objects that could look like they are growing out of your head.


Wrong: Pay attention to what is behind you.

Correct: Solid backgrounds usually work best.
5. Try several variations when posing.
Shoot from about 3 feet away. You want the picture to frame your upper body and head while leaving some space all around. Avoid weird camera angles, and don’t shoot from below your chin. Stand far enough away from the camera so your head is in proportion with the rest of your body (i.e., you want to avoid foreshortening—it will make you look very odd).
- Turn sideways to a three-quarter view and look at the camera. (Don’t turn your head back to the camera; keep it at the three-quarter position—just move your eyes to look directly at the camera.)
- Smile, cock your head a bit, stand in a three-quarter position, and look interested and engaged while maintaining eye contact with the camera.
- Pose as though you’re speaking to a crowd and showing them something exciting. Talk to the photographer about something that you’re interested in or passionate about so your expression looks natural.


Wrong: Avoid selfies, too much distance, and shooting from too high or low of an angle.

Correct: Photo taken from 3 to 5 feet away. Try several poses and angles.
6. Look at the lens.
Eye contact is very important. Look into the camera lens.
Wrong: Looking away gives the illusion of disinterest.
Correct: Look right into the camera lens.
7. Take LOTS of photos and evaluate as you go.
Take lots of photos with lots of different poses. Sometimes that one “this will never work” experiment is the best shot. Take photos standing, sitting, right-angled, left-angled, and straight-on. Try smiling, and looking serious. Then take many of each pose. Change your shirt and take another set. Take far more than you think you need. Put some music on during your shoot if that relaxes you. Pause occasionally to check what you have taken. Carefully scrutinize them and retake as needed.
8. Don’t crop the photo.
This photo may end up getting used in many different ways. Send in the uncropped photo, and we will crop it to fit the context in which it will be used.

Uncropped original photo


Some of the additional ways we may crop it
A good headshot:
- Shows a relaxed, confident you
- Catches you in a natural state
- Looks good at a small size
- Communicates something about your brand and your style
- Is a portrait you are proud to show to people
A bad headshot:
- Looks like a snapshot taken of you on vacation
- Looks like a mugshot
- Makes you look stiff or too solemn
- Is out of focus